مشخصات مقاله
-
539
-
0.0
-
2346
-
0
-
0
آموزش تگ ها در Spring Security
کتابخانه tag در امنیت Spring
کتابخانهJSP تگ برای JSP در امنیت Spring
امنیت Spring تگ های خود را برای صفحات jsp ارائه می کند. سه تگ برای دسترسی به اطلاعات امنیتی و اعمال محدودیت های امنیتی در jsp ها استفاده می شود. تگ های زیر برای امنیت لایه view برنامه، مورد استفاده قرار می گیرند.
- تگ مجوز(Authorize)
- تگ احراز هویت (Authentication)
- تگ Accesscontrollist
- تگ Csrfinput
- تگ CsrfMetaTags
تگ مجوز (Authorize)
این تگ برای اهداف مجوز- اجازه استفاده می شود. این تگ درخواست را ارزیابی و بررسی می کند که آیا درخواست دارای مجوز هست یا خیر. از دو خصیصه access و URL برای بررسی مجوز درخواست استفاده می کند. می توان برای ارزیابی این تگ، نقش کاربر را انتقال داد.
متن نوشته شده داخل این تگ تنها در شرایطی که رضایت از ویژگی حاصل شود، نمایش داده می شود. برای مثال:
< sec:authorize access="hasRole('ADMIN')">
It will display only is user is admin
< /sec:authorize>
تگ احراز هویت (authentication)
از این تگ برای دسترسی به هویت ذخیره شده در مفاد امنیتی استفاده می شود. اگر احراز هویت نمونه شی UserDetails باشد، میتوان جزییات کاربر فعلی را با استفاده از آن به دست آورد. برای مثال:
< sec:authentication property="principal.username">
تگ Accesscontrollist
این تگ به همراه ماژول acl امنیت Spring استفاده می شود. این تگ لیست مجوزهای مورد نیاز برای دامنه های مشخص شده را بررسی می کند. تنها در شرایطی که کاربر فعلی تمامی مجوز ها را داشته باشد اجرا می شود. برای مثال:
< sec:accesscontrollist hasPermission="1,2" domainObject="$ {someObject}">
 If user has all the permissions represented by the values "1" or "2" on the given object.
< /sec:accesscontrollist>
تگ CsrfInput
از این تگ برای ایجاد نشانه های(token) CSRF برای فرم html استفاده می شود. برای استفاده از آن اطمینان حاصل کنید که حفاظت CSRF فعال باشد. برای ایجاد نشانه CSRF باید این تگ را داخل تگ < form>< /form> قرار دهیم. برای مثال:
< form method="post" action="/some/action">
                < sec:csrfInput />

                Name:< br />

                < input type="text" name="username" />

                ...
< /form>
تگ CsrfMetaTags
این تگ، تگ meta را درج می کند که شامل نشانه (token) CSRF، فیلد فرم، نام سر برگ و مقدار نشانه CSRF است. این مقادیر برای تنظیم نشانه CSRF در برنامه در جاوا اسکریپت(JavaScript) مفید است. این تگ باید داخل تگ HTML < head> قرار گیرد.
Taglib JAR در امنیت Spring
برای پیاده سازی هر یک از این تگ ها، باید فایل taglib jar در امنیت Spring را در برنامه مان داشته باشیم. همچنین با استفاده از وابستگی maven ارائه شده در ادامه نیز میتواند اضافه شود.
< dependency>
    < groupId>org.springframework.security< /groupId>
    < artifactId>spring-security-taglibs< /artifactId>
    < version>5.0.4.RELEASE< /version>
< /dependency>
اعلان Taglib در امنیت Spring
در صفحه JSP ، میتوان با استفاده از اعلان زیر از taglib استفاده کرد.
<%@ taglib prefix="sec" uri="http ://www.springframework.org/security/tags" %>
حال، مثالی برای پیاده سازی این تگ ها در پروژه maven امنیت Spring را می بینیم. از STS (Spring Tool Suite) برای ایجاد پروژه استفاده می کنیم. مثال را ببینید.
پروژه را ایجاد کنید.
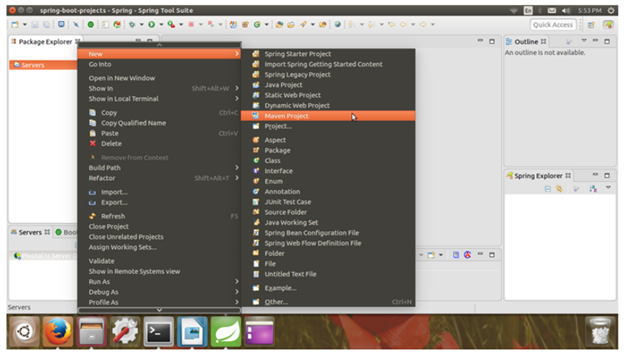
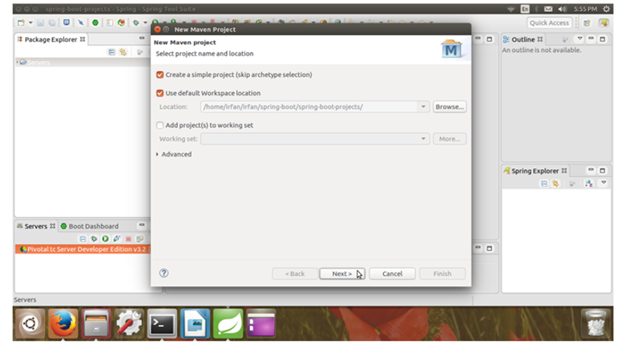
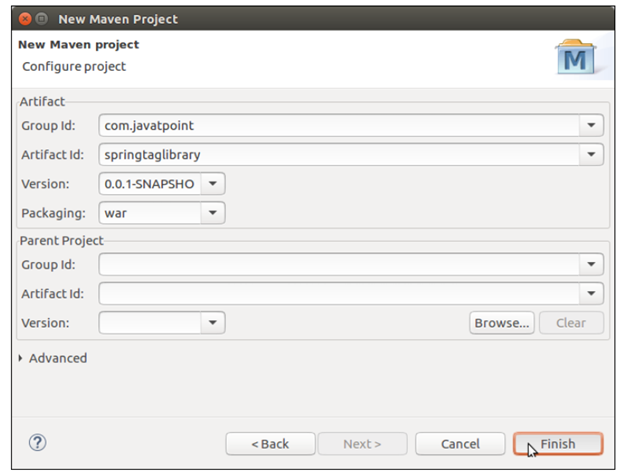
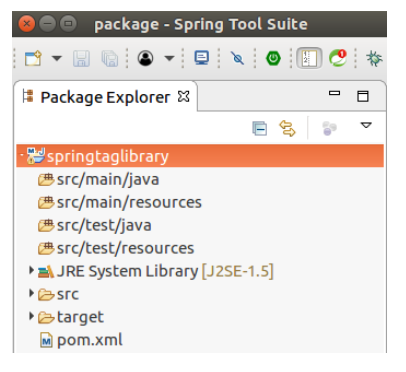
بر روی finish کلیک کنید و یک پروژه maven به شکل زیر ساخته می شود.
پیکربندی امنیت Spring
برای پیکربندی امنیت Spring در برنامه کاربردی MVC Spring، چهار فایل زیر را درون پوشه com.javatpoint قرار دهید.
AppConfig.java
package com.javatpoint;
import org.springframework.context.annotation.Bean;
import org.springframework.context.annotation.ComponentScan;
import org.springframework.context.annotation.Configuration;
import org.springframework.web.servlet.config.annotation.EnableWebMvc;
import org.springframework.web.servlet.view.InternalResourceViewResolver;
import org.springframework.web.servlet.view.JstlView;

@EnableWebMvc
@Configuration
@ComponentScan({ "com.javatpoint.controller.*" })
public class AppConfig {
    @Bean
    public InternalResourceViewResolver viewResolver() {
        InternalResourceViewResolver viewResolver
                          = new InternalResourceViewResolver();
        viewResolver.setViewClass(JstlView.class);
        viewResolver.setPrefix("/WEB-INF/views/");
        viewResolver.setSuffix(".jsp");
        return viewResolver;
    }
}
از AppConfig برای تنظیم پسوند مکان view مربوط به فایل های view استفاده می شود.
// MvcWebApplicationInitializer.java
package com.javatpoint;

import org.springframework.web.servlet.support.AbstractAnnotationConfigDispatcherServletInitializer;
public class MvcWebApplicationInitializer extends
        AbstractAnnotationConfigDispatcherServletInitializer {
    @Override
    protected Class[] getRootConfigClasses() {
        return new Class[] { WebSecurityConfig.class };
    }
    @Override
    protected Class[] getServletConfigClasses() {
        // TODO Auto-generated method stub
        return null;
    }
    @Override
    protected String[] getServletMappings() {
        return new String[] { "/" };
    }
}
از این کلاس برای مقدار دهی اولیه توزیع کننده servlet استفاده می شود.
// SecurityWebApplicationInitializer.java
package com.javatpoint;
import org.springframework.security.web.context.*;
public class SecurityWebApplicationInitializer
    extends AbstractSecurityWebApplicationInitializer {

}
یک کلاس دیگر برای ایجاد کاربر و اعمال مجوز و احراز هویت روی دسترسی کاربر ایجاد کنید.
// WebSecurityConfig.java
package com.javatpoint;

import org.springframework.context.annotation.*;
import org.springframework.security.config.annotation.web.builders.HttpSecurity;
import org.springframework.security.config.annotation.web.configuration.*;
import org.springframework.security.core.userdetails.*;
import org.springframework.security.core.userdetails.User.UserBuilder;
import org.springframework.security.provisioning.InMemoryUserDetailsManager;
import org.springframework.security.web.util.matcher.AntPathRequestMatcher;
@EnableWebSecurity
@ComponentScan("com.javatpoint")
public class WebSecurityConfig extends WebSecurityConfigurerAdapter {

@Bean
public UserDetailsService userDetailsService() {
    // ensure the passwords are encoded properly
     UserBuilder users = User.withDefaultPasswordEncoder();
     InMemoryUserDetailsManager manager = new InMemoryUserDetailsManager();
     manager.createUser(users.username("mohan").password("1mohan23").roles("USER").build());
     manager.createUser(users.username("admin").password("admin123").roles("ADMIN").build());
     return manager;
    }

@Override
protected void configure(HttpSecurity http) throws Exception {

      http.authorizeRequests().
      antMatchers("/index","/").permitAll()
      .antMatchers("/admin","/user").authenticated()
      .and()
      .formLogin()
      .and()
      .logout()
      .logoutRequestMatcher(new AntPathRequestMatcher("/logout"));

}
}
کنترلر
حال، یک کنترلر برای مدیریت درخواست و پاسخ دادن ایجاد کنید.
// HomeController.java
package com.javatpoint.controller;
import org.springframework.stereotype.Controller;
import org.springframework.web.bind.annotation.RequestMapping;
import org.springframework.web.bind.annotation.RequestMethod;
@Controller
public class HomeController {
    @RequestMapping(value="/", method=RequestMethod.GET)
    public String index() {
        return "index";
    }
    @RequestMapping(value="/user", method=RequestMethod.GET)
    public String user() {
       return "admin";
    }
    @RequestMapping(value="/admin", method=RequestMethod.GET)
    public String admin() {

        return "admin";
    }
}
View
برای نمایش خروجی به کاربر، فایل های view (jsp) را ایجاد کنید. سه فایل JSP ایجاد کرده ایم که در ادامه می بینیم.
// index.jsp
< html>
< head>
< title>Home Page< /title>
< /head>
< body>
< a href="user">User< /a> < a href="admin">Admin< /a> < br> < br>

Welcome to Javatpoint!
< /body>
< /html>
// user.jsp
< html>
< head>
< meta http-equiv="Content-Type" content="text/html; charset=UTF-8">

< title>Home Page< /title>
< /head>
< body>
Welcome to user page!
< /body>
< /html>
// admin.jsp
در صفحه ادمین، از تگ مجوز استفاده کرده ایم و تنها زمانی که از نقش داده شده رضایت حاصل شود، ارزیابی می شود.
< %@ taglib uri="http ://www.springframework.org/security/tags" prefix="security" %>< html>
< head>
< meta http-equiv="Content-Type" content="text/html; charset=UTF-8">

< title>Home Page< /title>
< /head>
< body>
Welcome to admin page!
< a href="logout">logout< /a> < br>< br>

< security:authorize access="hasRole('ADMIN')">
Hello ADMIN
< /security:authorize>
< security:csrfInput />

< /body>
< /html>
وابستگی های پروژه
پروژه ما شامل وابستگی های زیر است که برای ساخت برنامه مورد نیاز است.
// pom.xml
< project xmlns="http ://maven.apache.org/POM/4.0.0" xmlns:xsi="http ://www.w3.org/2001/XMLSchema-instance" xsi:schemaLocation="http ://maven.apache.org/POM/4.0.0 http ://maven.apache.org/xsd/maven-4.0.0.xsd">
   < modelVersion>4.0.0< /modelVersion>
   < groupId>com.javatpoint< /groupId>
   < artifactId>springtaglibrary< /artifactId>
   < version>0.0.1-SNAPSHOT< /version>
   < packaging>war< /packaging>
   < properties>
     < maven.compiler.target>1.8< /maven.compiler.target>
     < maven.compiler.source>1.8< /maven.compiler.source>
< /properties>
< dependencies>
   < dependency>
             < groupId>org.springframework< /groupId>
             < artifactId>spring-webmvc< /artifactId>
             < version>5.0.2.RELEASE< /version>
         < /dependency>
         < dependency>
         < groupId>org.springframework.security< /groupId>
         < artifactId>spring-security-web< /artifactId>
         < version>5.0.0.RELEASE< /version>
     < /dependency>
< dependency>
     < groupId>org.springframework.security< /groupId>
     < artifactId>spring-security-core< /artifactId>
     < version>5.0.4.RELEASE< /version>
< /dependency>
< !-- https ://mvnrepository.com/artifact/org.springframework.security/spring-security-taglibs -->
< dependency>
     < groupId>org.springframework.security< /groupId>
     < artifactId>spring-security-taglibs< /artifactId>
     < version>5.0.4.RELEASE< /version>
< /dependency>
     < !-- https ://mvnrepository.com/artifact/org.springframework.security/spring-security-config -->
< dependency>
     < groupId>org.springframework.security< /groupId>
     < artifactId>spring-security-config< /artifactId>
     < version>5.0.4.RELEASE< /version>
< /dependency>
         < !-- https ://mvnrepository.com/artifact/javax.servlet/javax.servlet-api -->
< dependency>
    < groupId>javax.servlet< /groupId>
    < artifactId>javax.servlet-api< /artifactId>
    < version>3.1.0< /version>
    < scope>provided< /scope>
< /dependency>
< dependency>
     < groupId>javax.servlet< /groupId>
     < artifactId>jstl< /artifactId>
     < version>1.2< /version>
< /dependency>
< !-- https ://mvnrepository.com/artifact/org.springframework/spring-framework-bom -->
< /dependencies>
  < build>
    < plugins>
         < plugin>
              < groupId>org.apache.maven.plugins< /groupId>
              < artifactId>maven-war-plugin< /artifactId>
              < version>2.6< /version>
              < configuration>
                   < failOnMissingWebXml>false< /failOnMissingWebXml>
              < /configuration>
         < /plugin>
    < /plugins>
< /build>
< /project>
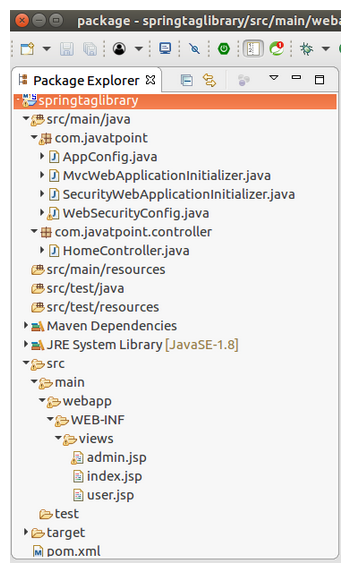
پس از اضافه کردن تمام این فایل ها، پروژه ما به این شکل خواهد بود.
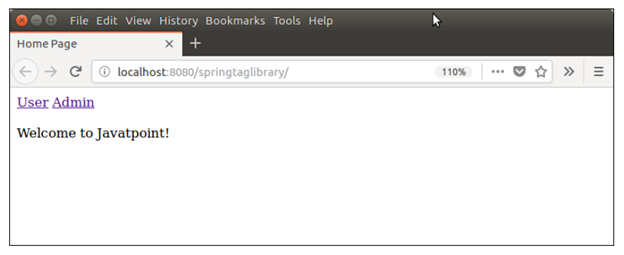
برنامه را اجرا کنید. روی پروژه کلیک راست کنید و گزینه اجرا روی سرور (run on server) را انتخاب کنید. خروجی زیر را در مرورگر نشان خواهد داد.
روی user کلیک کنید و با ارائه اطلاعات موجود در فرم AppSecurityConfig ، وارد شوید.
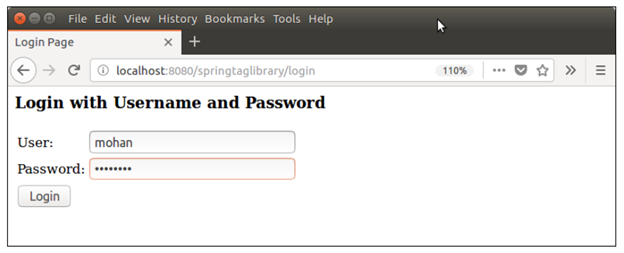
پس از ورود موفقیت آمیز، صفحه ادمین را به شکل زیر نشان می دهد. در اینجا، توجه داشته باشید که مفاد نوشته شده داخل تگ مجوز نشان داده نمی شود زیرا کاربر نقش USER دارد.
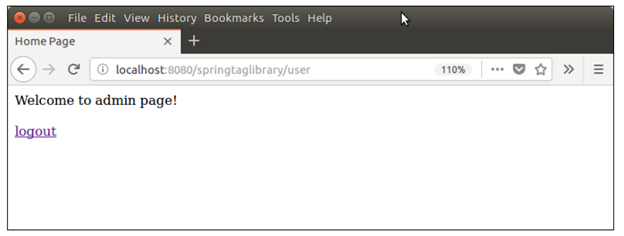
خارج شوید و با ارائه اطلاعات ادمین با نقش ادمین وارد شوید.
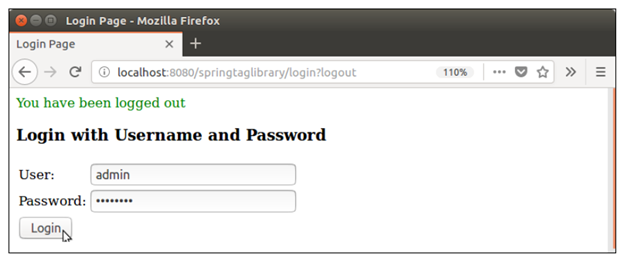
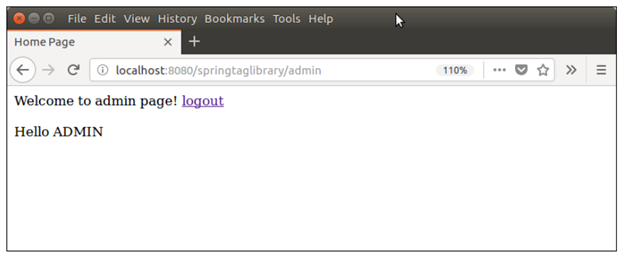
پس از ورود به عنوان ادمین، این بار تگ مجوز ارزیابی می شود و خروجی زیر را نشان می دهد.